Wallet-based business cards
Posted on by Angelo Stavrow
Fun little morning project. 📇📲
— Angelo Stavrow (@AngeloStavrow) May 14, 2016
(Barcode is blurred because I’m not quite done yet. 🙃) pic.twitter.com/4eXh5NdTCP
A couple of months ago I played a little bit with PassKit and Wallet after finding this little tutorial on adding a business card to Passbook (now named Wallet).
A Wallet pass is pretty easy to create—just fill some metadata into a JSON file, create a Pass Type ID certificate in your Apple Developer account, and then run a signing utility. The whole process is pretty well described, step-by-step, here, so I won’t re-iterate, but here are a couple of little perils and pitfalls to watch out for:
-
To run
signpass, you’ll need to download the Xcode project in the Wallet Developer Guide. Unzip the download and open signpass.xcodeproj in the signpass folder. Build it, right-click on the executable in the Products folder in Xcode’s file navigator, and select “Show in Finder”; drag and drop it into your Documents folder. -
After you run
signpassfrom the Terminal, runopen PassName.pkpassand it’ll open in a Preview QuickLook window. From here, you can click on the “Add to Wallet” button and it’ll go up to iCloud and download to your iOS devices, without having to upload it to a server.
-
If the pass doesn’t show up in your iOS device, there’s probably a typo in your JSON. Look for extra/missing commas, parentheses, square brackets, &cet.
-
You can double-check by launching Xcode’s Simulator, launching the Wallet app, and dragging and dropping your .pkpass file from the Finder into your Simulator Wallet. If everything checks out, it’ll ask if you want to add it.
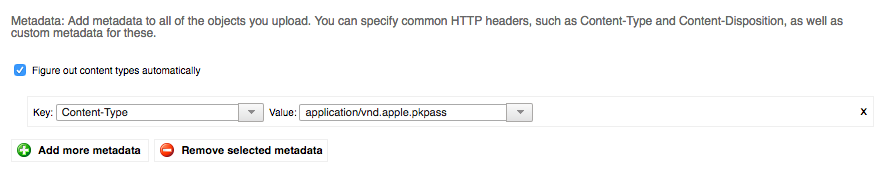
- If you’re uploading it to S3, make sure you set the Content-Type to
application/vnd.apple.pkpass. Normally, this is a dropdown, but you can also just type whatever you want in there and S3 will accept it.
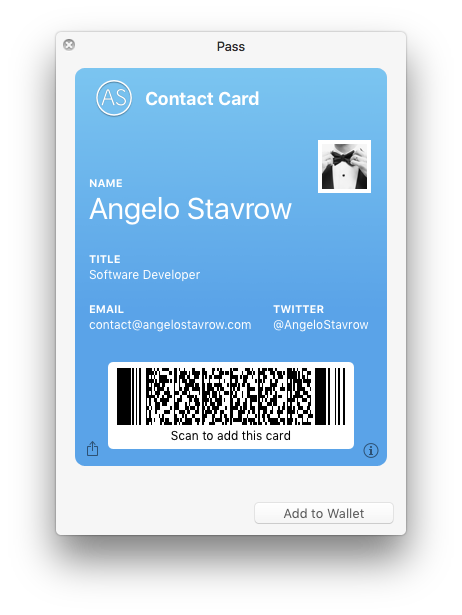
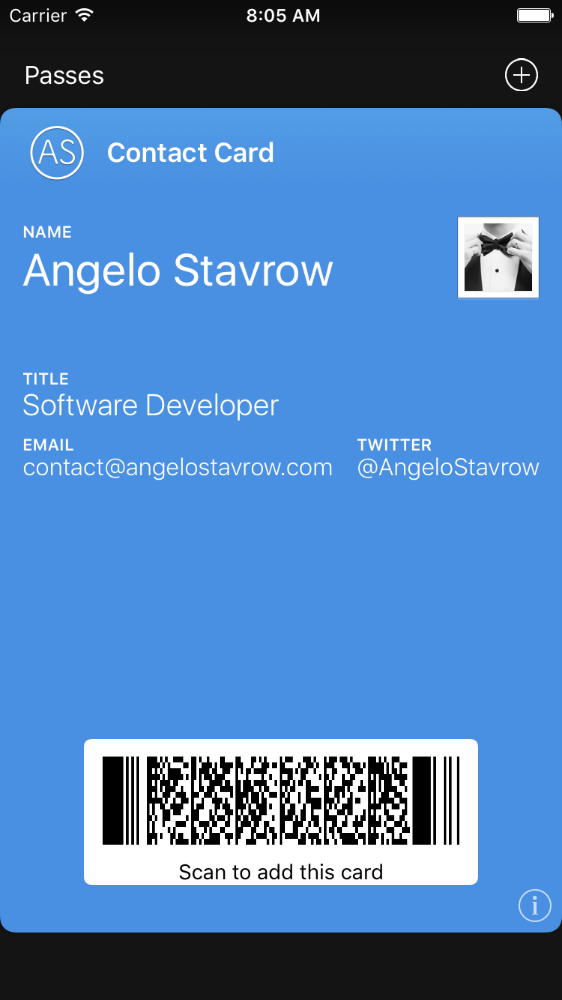
And now you have a fancy electronic business card that other iPhone users can scan and download. Have fun!